Skip to content

Using Care Gap Explorer

Learn how to move from population monitoring to patient follow-up.

Watch the walkthrough

A guided tour of the whole application. Prefer to read? The same route is written out step by step below.

Using Care Gap Explorer

Length 1:22

Take a guided tour from population monitoring to patient review, workflow tracking, analytics, and Ask AI.

Captions available in the player.

The route through the application

  1. Home
  2. Care Gaps
  3. Patient workspace
  4. Tasks
  5. Analytics
  6. Ask AI
  1. Step 1

    Home

    Where the population needs attention, at a glance.
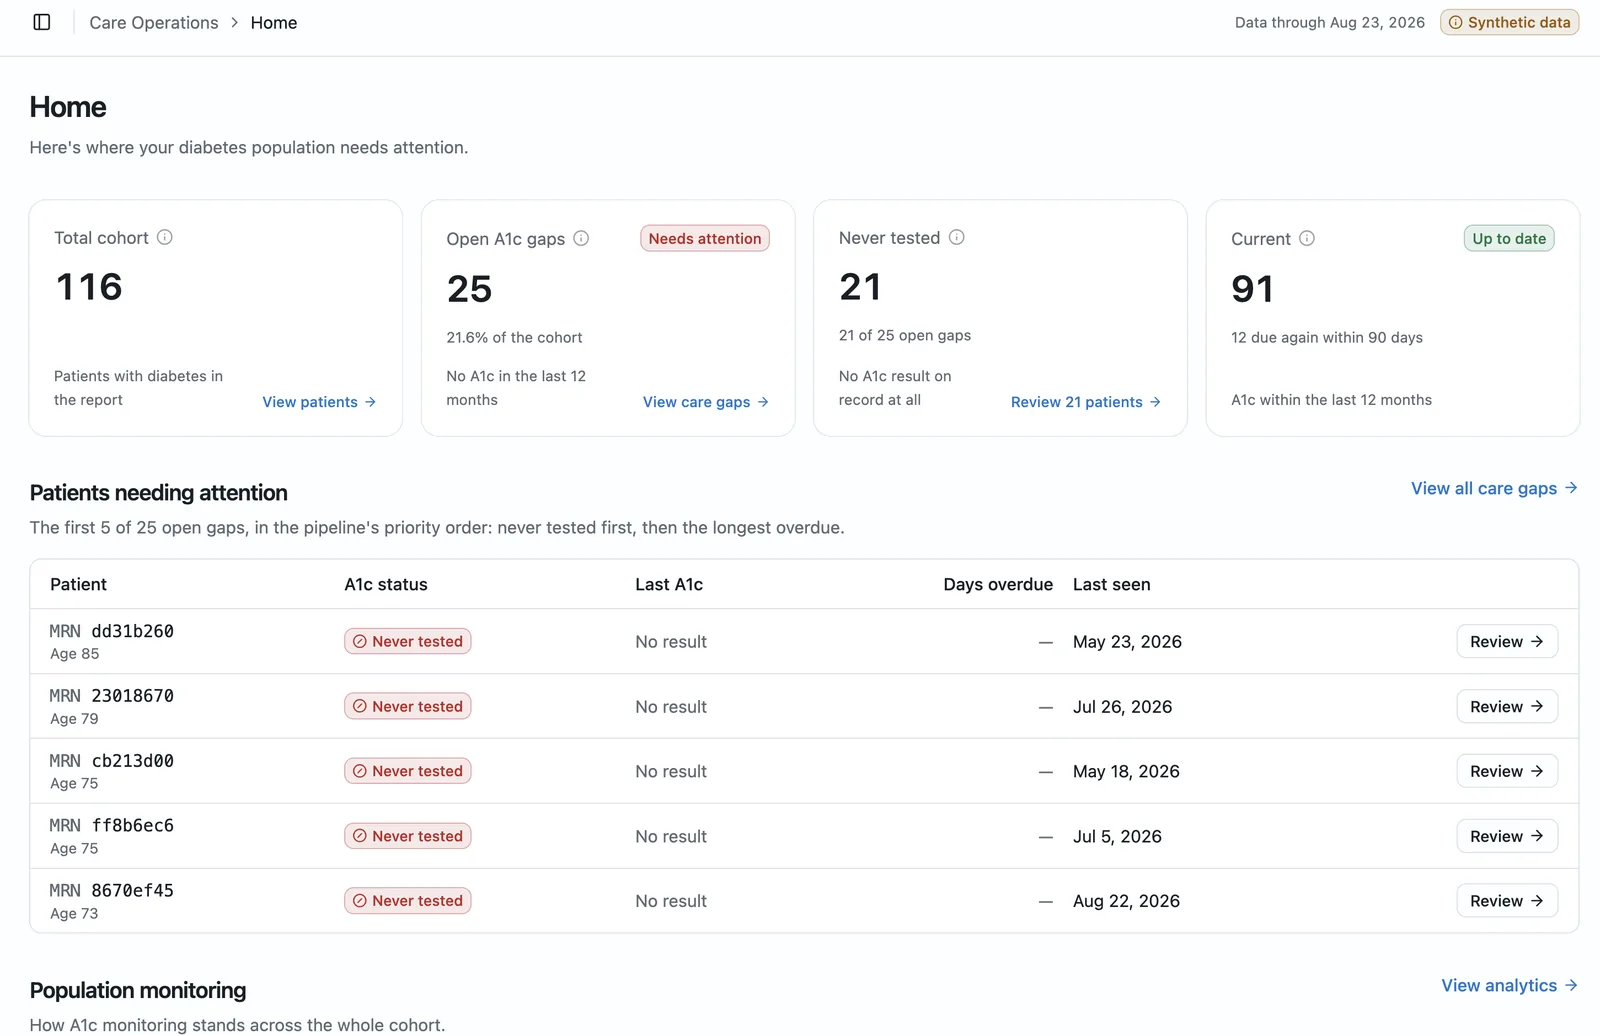
    • See the cohort, open gaps, never tested and current in four figures
    • Spot the first patients needing attention
    • Jump to Care Gaps, Patients or Analytics
    Open Home
    Home: four figures for the cohort, open gaps, never tested and current, above the first five patients needing attention. (opens the full-size screenshot)
    Four figures, then the first five open gaps in priority order.
  2. Step 2

    Care Gaps

    The work queue: every patient with an open A1C gap.
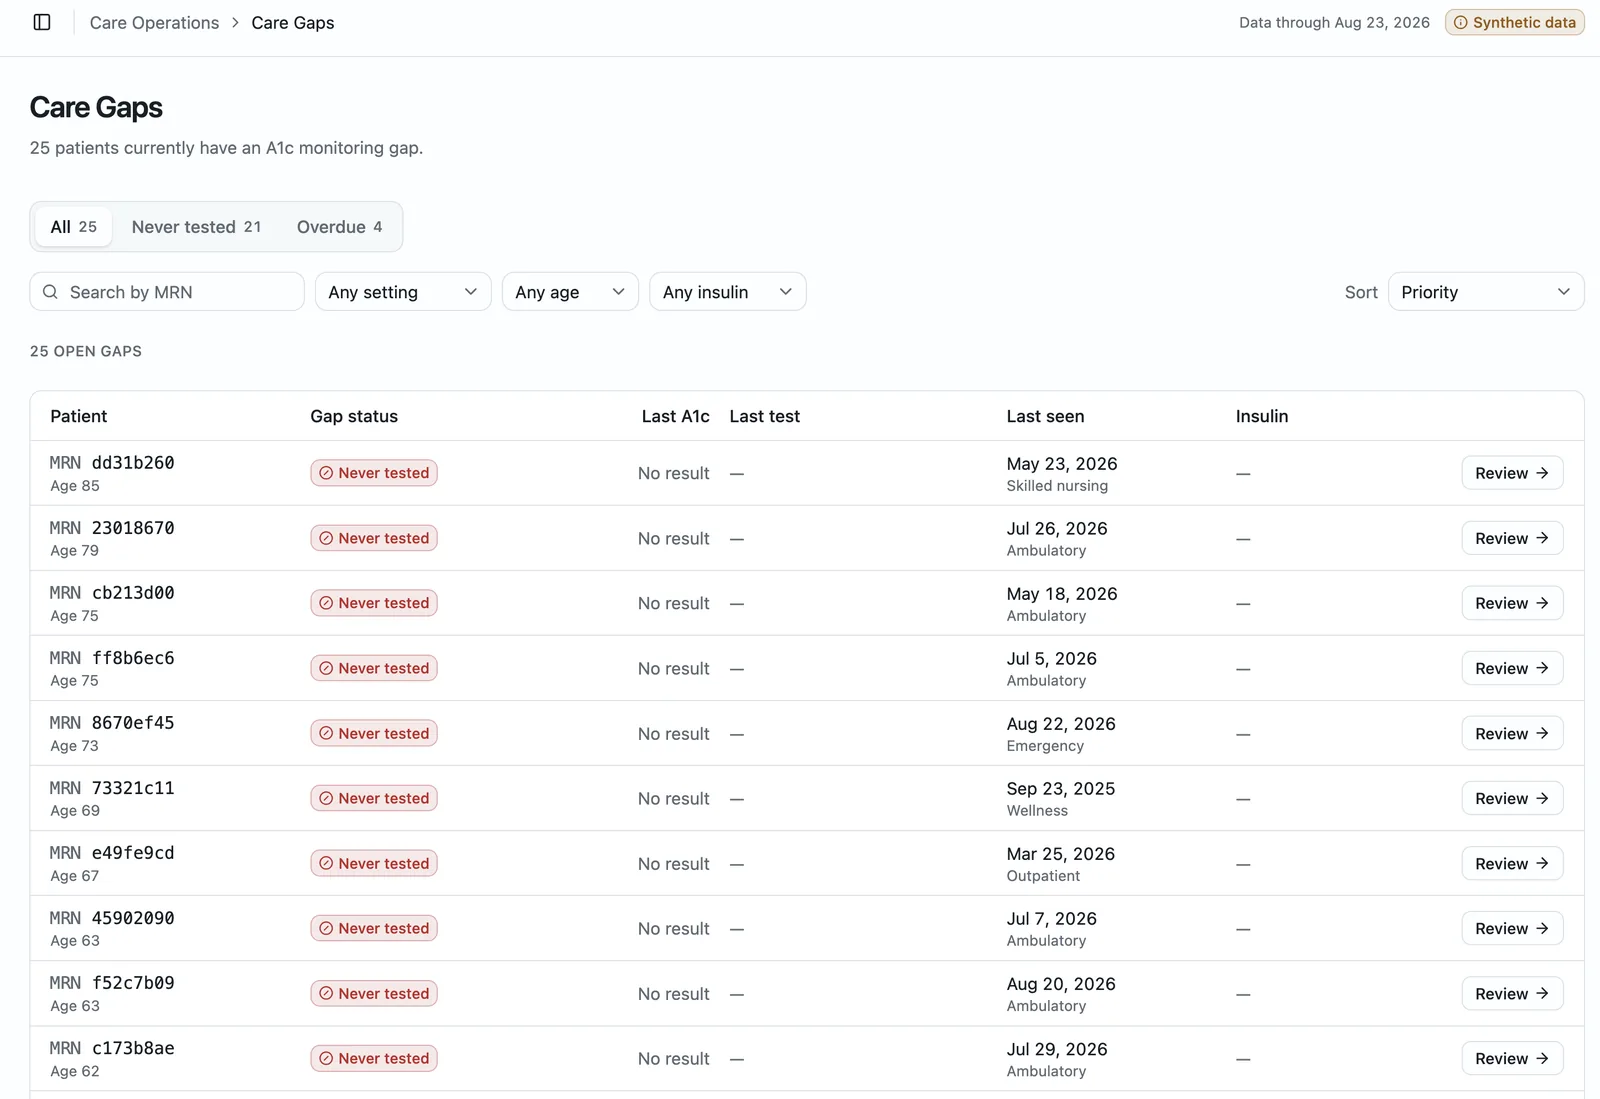
    • Filter by never tested or overdue, setting, age and insulin
    • Work in Care Gaps order, never tested first
    • Review any patient's evidence
    Open Care Gaps
    Care Gaps: tabs for all, never tested and overdue, filters for setting, age and insulin, and the list of open gaps with a Review button on each row. (opens the full-size screenshot)
    Tabs and filters narrow the 25 open gaps; Review opens a patient's evidence.
  3. Step 3

    Patient workspace

    One patient: why they have their status, and their history.
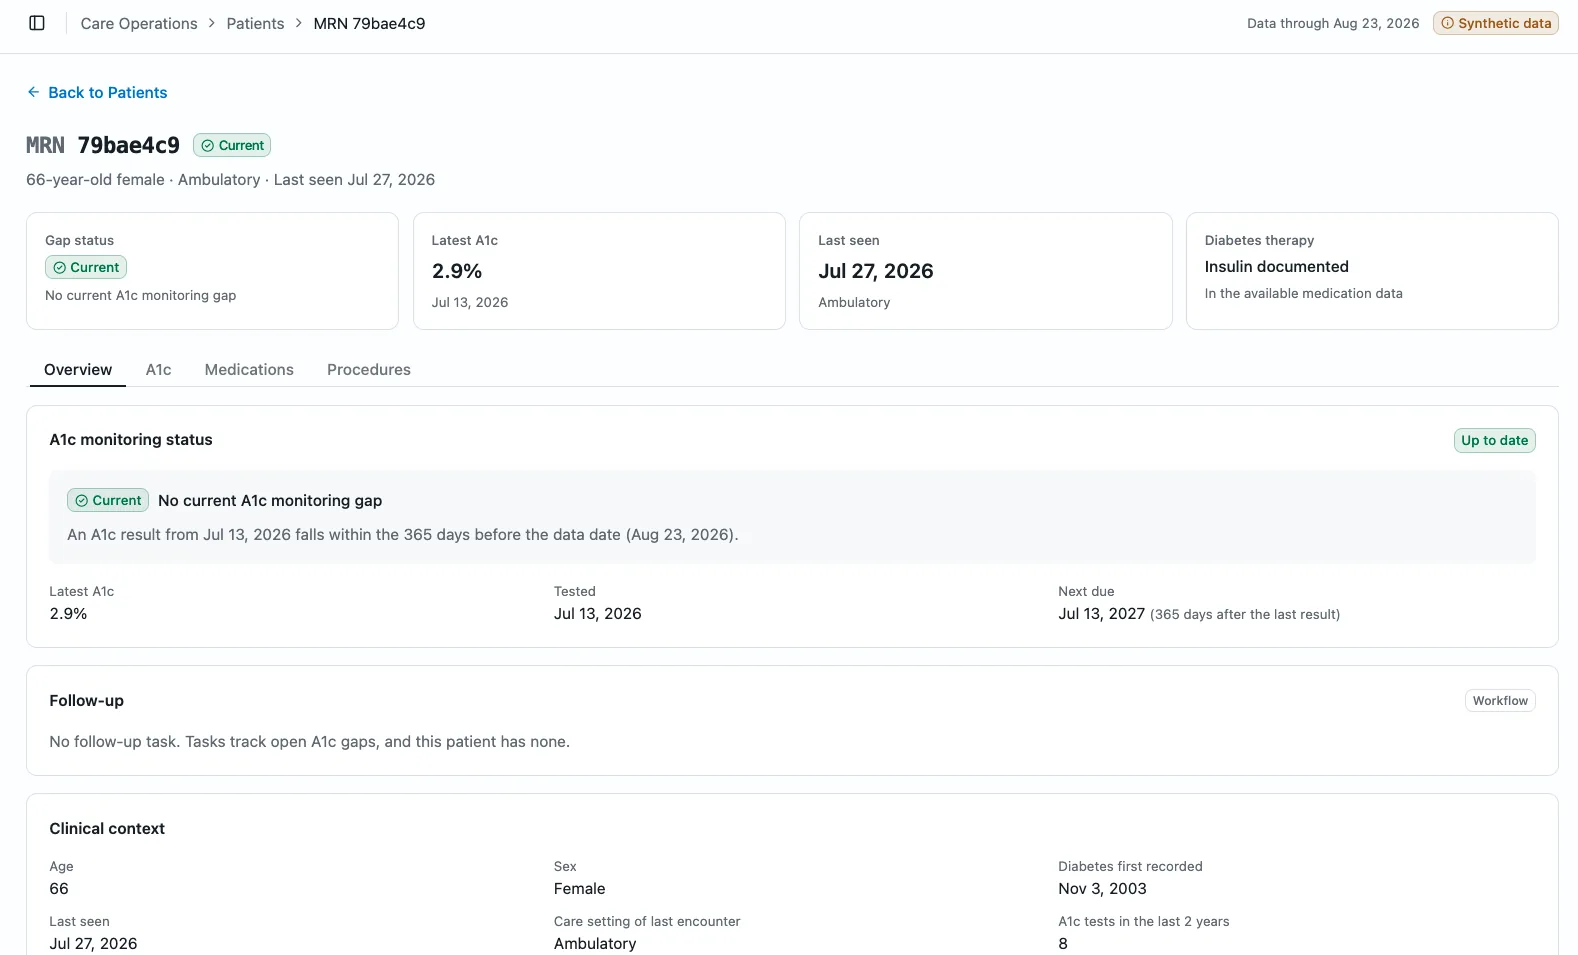
    • Read the care-gap assessment and its evidence
    • Inspect every A1C on file, testing per year, medications and procedures
    • Open the follow-up task for the gap
    Open Patient workspace
    A patient workspace: status, latest A1C, last seen and diabetes therapy, with tabs for Overview, A1C, Medications and Procedures, and the A1C monitoring status. (opens the full-size screenshot)
    One patient's status and the reason for it, with A1C history, medications and procedures a tab away.
  4. Step 4

    Tasks

    Follow-up on each open gap, as demo workflow data.
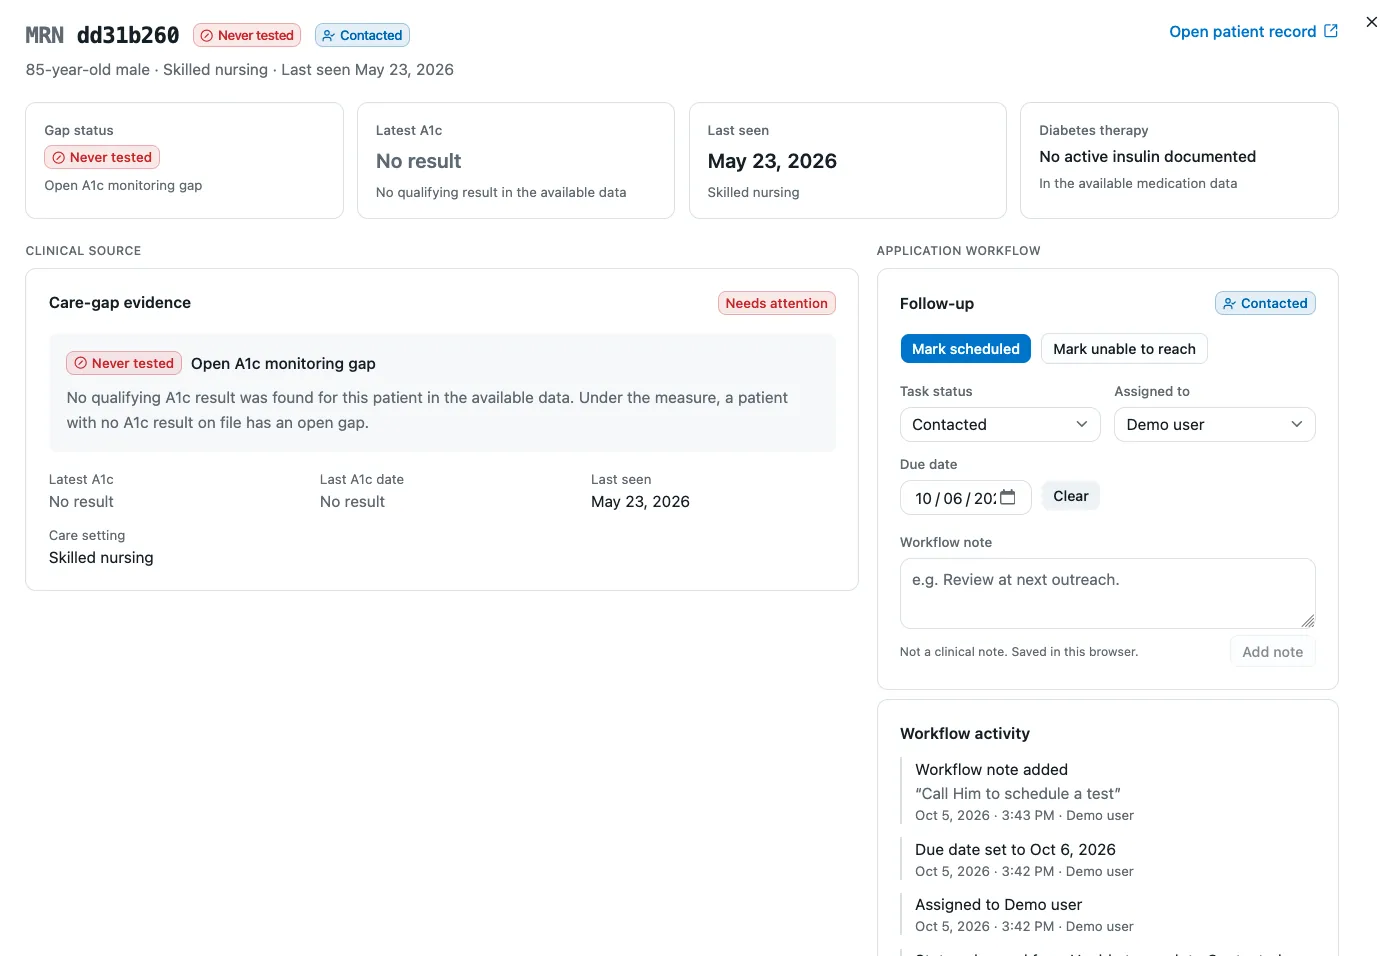
    • Move a task through review, outreach, scheduling and completion
    • Assign it, set a due date and add a workflow note
    • See its workflow activity
    Open Tasks
    A task opened from Tasks: the clinical care-gap evidence on the left, and on the right the follow-up controls and the workflow activity. (opens the full-size screenshot)
    A task beside its evidence: status, assignee, due date, note and every change, kept apart from the clinical data.
  5. Step 5

    Analytics

    How A1C monitoring is going across the whole cohort.
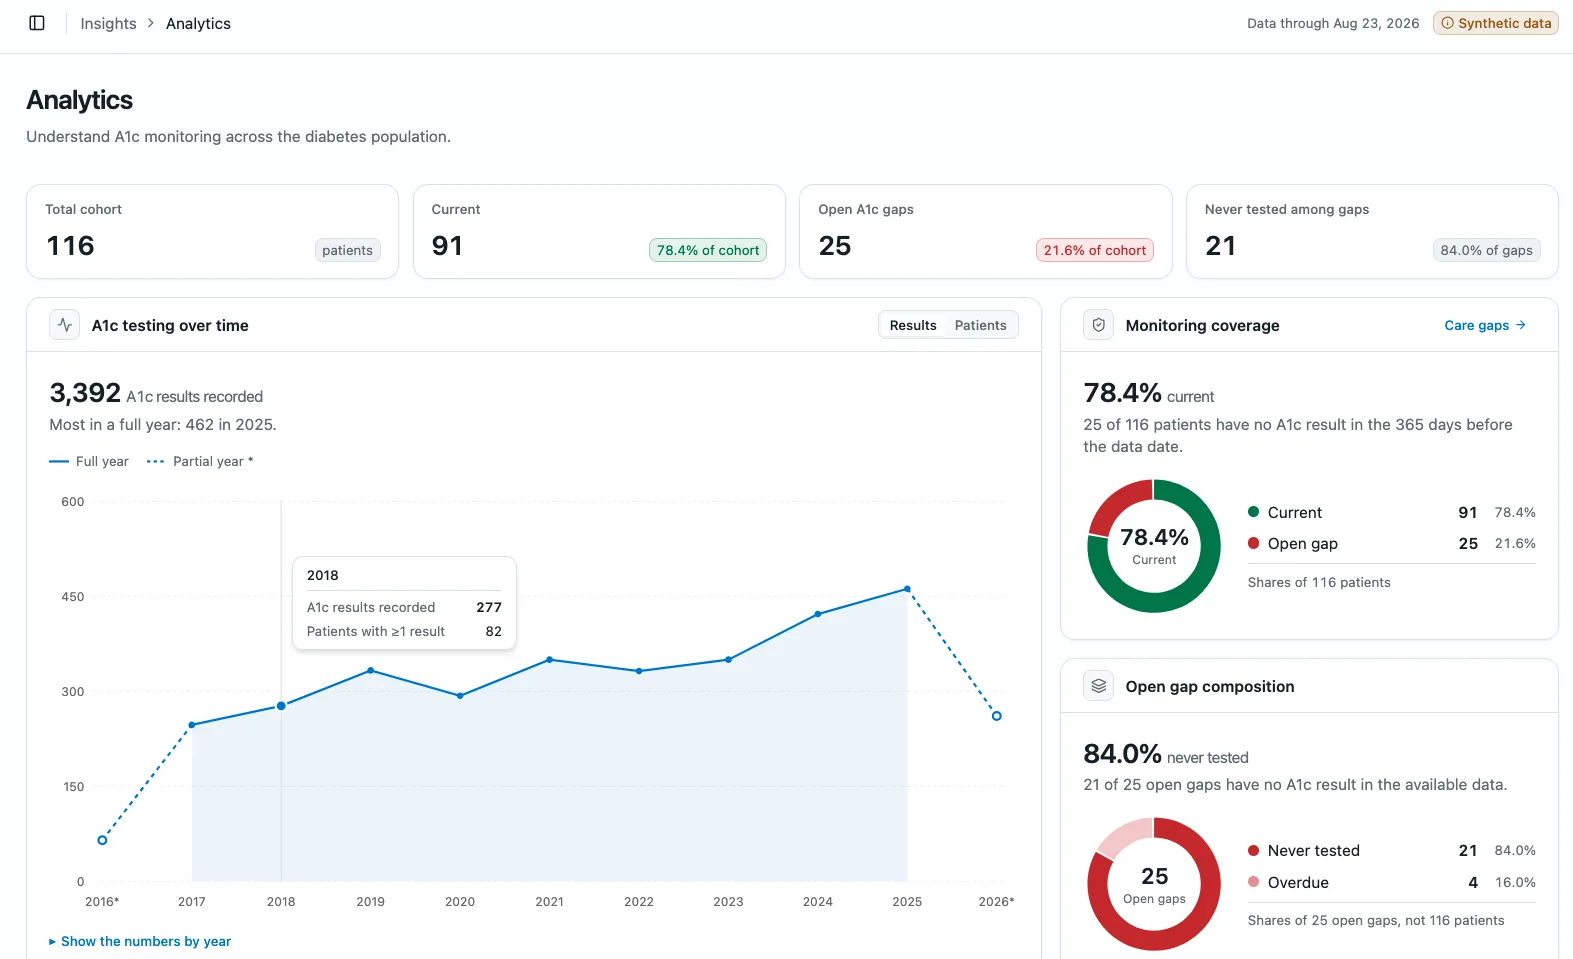
    • Coverage and the make-up of the gaps
    • Gap rates by age band and care setting, with their denominators
    • Testing over time and the spread of latest results
    Open Analytics
    Analytics: four figures, A1C testing over time as a line chart, and donut charts for monitoring coverage and open gap composition. (opens the full-size screenshot)
    Coverage, the make-up of the gaps, and A1C testing year by year.
  6. Step 6

    Ask AI

    Questions about the cohort, in plain words.
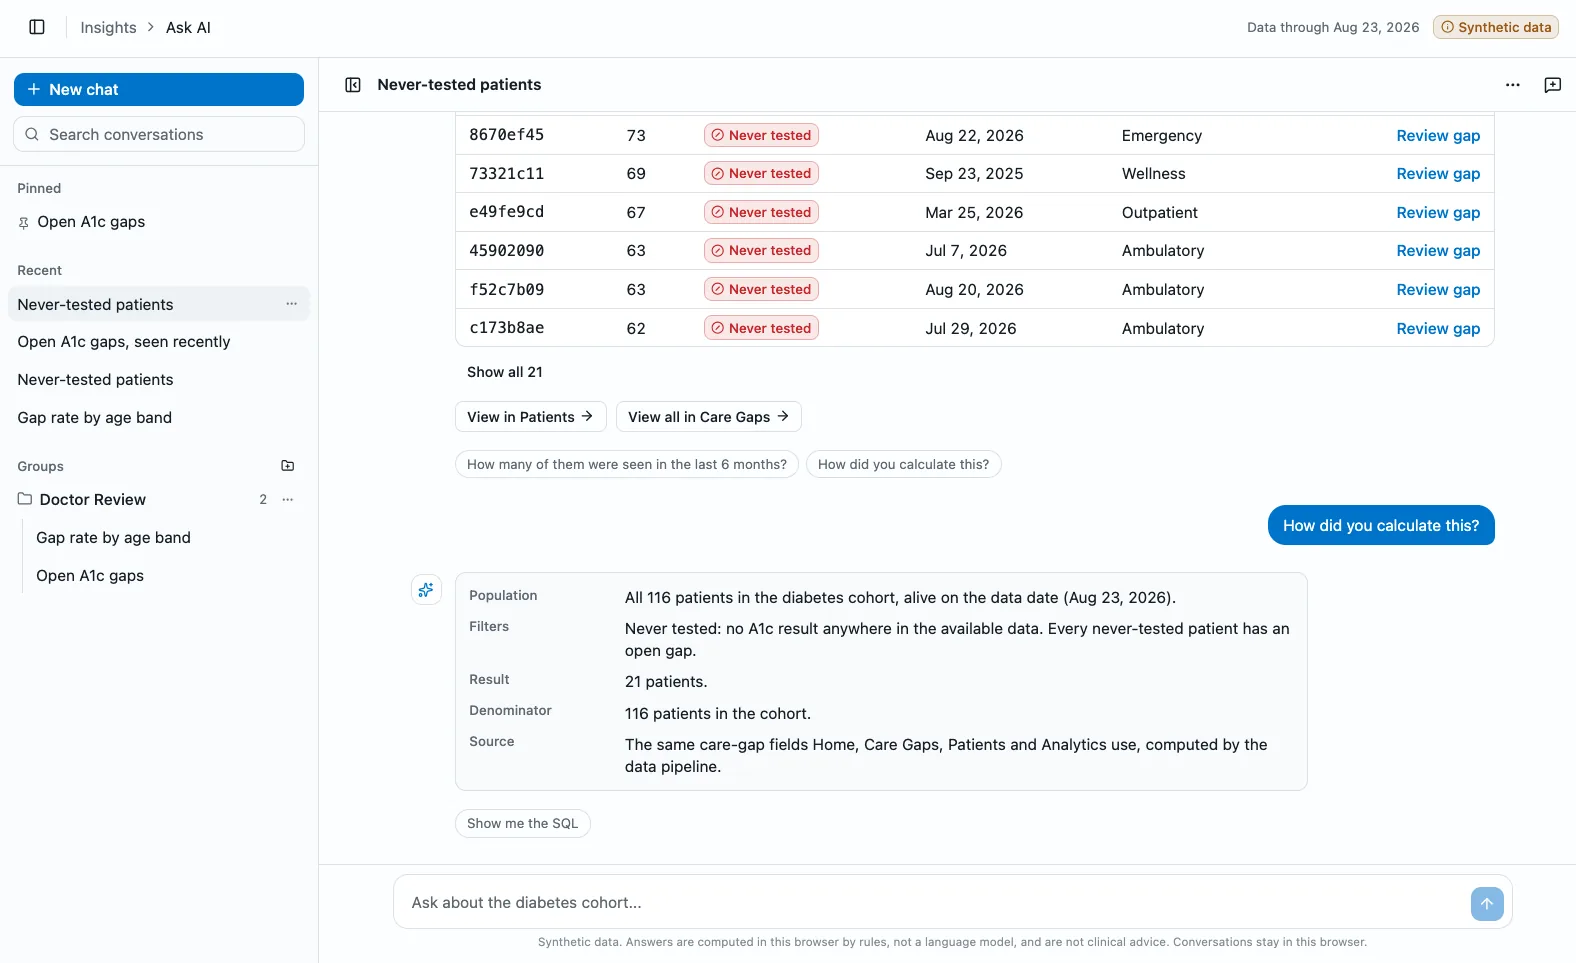
    • Ask how many, which patients, or how groups compare
    • Follow up on the last answer
    • Ask how an answer was calculated
    Open Ask AI
    Ask AI: never-tested patients listed in answer to a question, follow-up suggestions, and the answer to How did you calculate this, showing population, filters, result, denominator and source. (opens the full-size screenshot)
    An answer, its follow-ups, and how it was calculated.